Kubernetes

GitOps Demystified

Yesterday I saw a zinger of an article on a topic I’ve thought about a lot in the last few years: GitOps.

From the title, “GitOps is a Placebo,” I expected a post on the good and bad of what Steve had seen from GitOps with an ultimately negative overall sentiment. However, he takes a cynical view of the entirety of GitOps saying that really it “has no new ideas of substance.”

I understand some of the points he makes around marketing hype but I do think there is some merit if we distill it down to its principles (which, as he says, are not new) and how they are applied in a set of specific scenarios with a certain set of tools and therefore communities. One thing that has been clear to me over the last couple of years is that GitOps confuses a lot of people. Some think they are already doing it by checking in code to a repo and others think they can sprinkle in a few tools to solve all of their CD problems.

I’ll try to give my view of what GitOps is and assess some of its pros and cons. I’ll also try to give a bit more insight into what it looks like to:

  • Implement GitOps in the context of the CNCF (Kubernetes, Flux, Argo, etc.)
  • Use a GitOps pattern, which, as Steve mentions, has existed in many places for many, many years as Continuous Delivery and DevOps patterns

“GitOps” is coined

Let’s start with a little bit of the origin story…

“GitOps” was coined as a term for a set of practices that can be used to continuously deliver software. This term was first used by Alexis Richardson in 2017 as a way to define the patterns and tools the teams at Weaveworks used to deliver software and manage their infrastructure. Namely, they used declarative definitions of infrastructure via Terraform and applications via Kubernetes YAML that are versioned in a Git repository branch, then submitted for approval and applied by automation.

Kubernetes configs were applied by a tool they built, called Flux, that would poll a Git branch and ensure that any changes to the repo were realized in their clusters. The team took things one step further after deployment to mitigate config drift. They used tools (kubediff and terradiff) to check the configuration in their repos and compare it to their running infrastructure. When a discrepancy was found they would get alerted (via Slack) to out-of-band changes to the system so they could rectify them.

The diagram below shows what the implementation of the pattern and tools looked like at Weaveworks in 2017. They used Flux as an “Actuator” to apply config to Kubernetes APIs and kubediff as a “Drift Detector” to notify in Slack when drift occurred.

If you abstract away the specific tools used you see a pattern like this:

The evolving GitOps tool landscape

GitOps tools have evolved since 2017 with many more vendors implementing the “Deployment System” box and the creation of new sub-systems that aid with things like managing configuration (Helm/Kustomize/etc) and canary releases. One big change in the architecture of the pattern is that the “Actuator” and “Drift Detector” components have been unified into a single system that does both tasks. Additionally, drift detection has been extended to remediation where if config drift is detected, the “Deployment System” resets any changes to what is stored in the Git repository.

To that end, we can simplify things in our pattern and say that a GitOps “Deployment System” has the following attributes:

  • Polls a Git repo to detect changes
  • Mutates the infrastructure to match the committed changes
  • Notifies or remediates when config drift occurs

What are the underlying capabilities that the pattern leverages?

While the term “GitOps” was new in 2017, as the initial article states: “There is prior art here.” The general pattern described above has been in active use among many config management communities through things like Chef, Puppet, and Ansible’s server components. Dr. Nicole Forsgren, Jez Humble and the DORA team have shown how the attributes above and many other key capabilities have helped enterprises ship better software for years. Side note: this content from the team is EXCEPTIONAL.

Let’s break down some of the tradeoffs of GitOps. I’ll frame these broadly in the terms used by DORA in their DevOps Capability Catalog:

  • Version Control and Streamlined Change Approval – Use Git repos as a way to store the state you want your system to be in. Ensure that humans can’t commit directly to the Git repo+branch and changes must receive a review before merging.
    • Pros
      • Changes become transactional
      • Rolling back changes can be done by reverting commits (you hope)
      • Each change has an audit trail with metadata about the contents, time, author, reviewer
      • Pull requests provide a place for discourse on the proposed changes
      • PR can hold the status of the change as it progresses through the system
      • Use existing RBAC applied in the repo for who can commit/merge/review etc.
    • Cons
      • Break glass scenarios can become more cumbersome
      • Roll backs can be difficult
      • Not all roles (infra/security/etc) are comfortable with Git
      • Code level RBAC isn’t always the correct granularity or UX for deployment approvals
  • Deployment Automation – When changes are merged into the correct branch, an “Actuator” detects the change by polling for new commits. The “Actuator” decides what changes need to be made to realize the desired configuration and then calls APIs to bring the system into the right state.
    • Pros
      • The change authors nor the CI system need access to the APIs, only the actuator does.
      • “Actuator” can continually reconcile the state of the system
    • Cons
      • “Actuator” has to be kept up-to-date as the platform it is deploying to evolves
  • Proactive Failure Detection – There is a subsystem in the “Deployment System”, the “Drift Detector”, which reads from the Git repo and the imperative APIs to detect whether the configuration doesn’t match the current state of the system. If there is a discrepancy, it sends a notification to administrators so they can rectify it.
    • Pros
      • Changes made out-of-band from the deployment system are flagged for inspection and/or remediation.
    • Cons
      • If multiple deployment systems have been wired up or manual changes are required, they can create false negatives.

GitOps with Jenkins and GCE? Please Vic, no.

Okay, so we’ve broken down some of the key capabilities. Let’s see if we can take some tooling from pre-Kubernetes times to implement a similar “Deployment System”.

As most of you know, I’m quite a fan of Jenkins. Let’s see if we can use it to follow the GitOps pattern but rather than deploying to Kubernetes, let’s deploy a set of VMs in Google Compute Engine. Since Jenkins is a relatively open ended CI system and has very strong polling and Git repo capabilities, this should be a breeze.

First we’ll create a GCE Instance and gather its configuration:

# First create the instance
gcloud compute instances create jenkins-gce-gitops-1

# Now export its config to disk
gcloud compute instances export jenkins-gce-gitops-1 > jenkins-gce-gitops-1.yaml

The resulting file should contain all the info about your instance:

Next, we’ll create a Jenkins Job to do the work of the “Actuator” above. We’ll set it to poll the source code repository every minute for changes:

Now, we’ll write a Jenkinsfile that will take the configuration from our repo and apply it into the Google Compute Engine.

pipeline {
    agent any
    stages {
        stage('Actuate Deployment') {
            steps {
                sh '''
                   cd instances
                   for instance in `ls`;do   
                      NAME=$(basename -s .yaml $instance)
                      # Update instance config
                      gcloud compute instances update-from-file $NAME \
                                               --source $NAME.yaml
                   done
                '''
            }
        }
    }
}

This script will now trigger on each commit to our repo and then update the configuration of any instances that are defined in the instances folder.

Next, we need to setup our “Drift Detector”, which will be implemented as a second Jenkins job. Instead of polling the Git repo every minute, I’m going to have it run every minute regardless of whether there was a change or not.

In the case of the “Drift Detector,” we are going to write a small script to ensure that the config in Google Compute Engine matches our config in the repo. If not, we’ll send an email to report the issue.

pipeline {
    agent any

    stages {
        stage('Detect Drift') {
            steps {
                sh '''
                   cd instances
                   for instance in `ls`;do
                      NAME=$(basename -s .yaml $instance)
                      # Export current config
                      gcloud compute instances export $NAME > $NAME.yaml
                   done

                   # Exit 1 if there is a difference in the config
                   git diff --exit-code
                '''
            }
        }
    }
    post {
        failure {
            mail to: "viglesias@google.com",
                 subject: "[ERROR] Drift Detected",
                 body: "Click here for more info: ${env.BUILD_URL}"
        }
    }
}

With that in place we now have our “Drift Detector” doing its job. It will notify us if anything changes with that GCE instance. We’ll test this by updating a field on our instance out-of-band of the “Deployment System”, like setting the Deletion Protection flag via gcloud:

gcloud compute instances update jenkins-gce-gitops-1 --deletion-protection

Within a minute or two we should see an email from Jenkins telling us about the drift:

When we click the link it sends us to the build itself where we can see the logs showing what the config drift was:

What if we wanted to automatically remediate issues like this? In the case of the system built here, all you’d need to do is set up the “Actuator” job to run when new changes come in AND periodically (like the “Drift Detector”).

Now the “Actuator” will correct any differences in config, even if there weren’t any new commits.

Let’s take a look at the system we have built with Jenkins:

Wait a second! Jenkins, API driven VM management and e-mail have been around FOREVER!

So why is everyone talking about GitOps?

GitOps shows an opinionated way to implement a long standing pattern with a specific set of tools (flux/ArgoCD/ConfigSync/etc) for deploying to a specific type of infrastructure, namely Kubernetes.

GitOps’ opinionation was key to its adoption and broad reach of this implementation of the existing pattern within the fast-growing community of Kubernetes practitioners. This was especially important in 2018/2019, as teams were just becoming comfortable with Day 2 operations of Kubernetes, as well as starting to configure continuous delivery for their more critical applications. Weaveworks has done a great job marketing GitOps, promoting the patterns and tools, all while growing a community around both.

In summary…

Is GitOps a panacea? Definitely not but maybe it can help your team. Run an experiment to see.

Can the patterns be implemented with a plethora of tools and platforms? Absolutely!

Is there a community of folks working hard to make tools and patterns, as well as learning from each other to make them better? You betcha. Keep an eye on what they are doing, maybe it’ll be right for you one day. You may learn something that you can implement for your existing CD system.

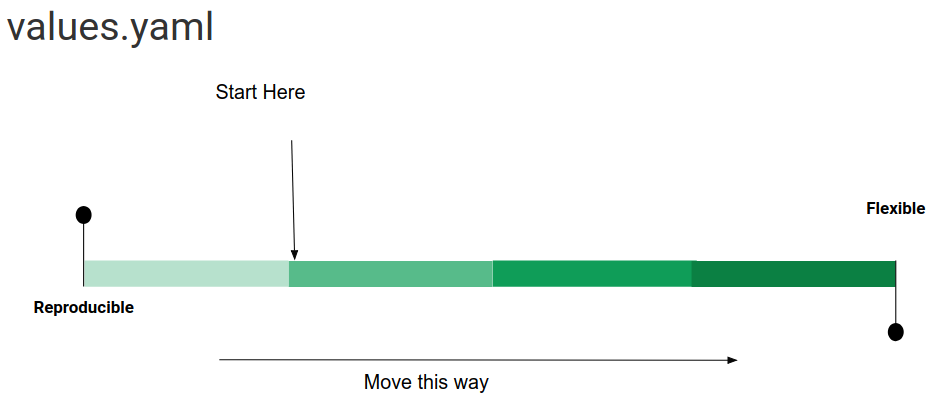
I believe that a key to success for tools in this space is in the opinionation they provide for how you deliver software. These opinions need to be strong enough to get you moving forward with few decisions but flexible enough to fit into your existing systems. If that balance is right, it can accelerate how you build the higher order socio-technical systems that get you more of the DevOps Capabilities that you should be striving for. At the end of the day, you should let teams pick the tools that work best for them.

The underlying truth, however, is that the tools and platforms, GitOps-ified or not, are a small piece of the puzzle. Bryan Liles put it well that GitOps can “multiply your efforts or lack of effort immensely” and that applies not just to GitOps but most new tools you’ll onboard.

If you don’t have some of these key process and cultural capabilities in your organization, it’s going to be harder to improve the reliability and value generation of your software delivery practice:

If you’ve made it this far, thanks for reading my opinions on this topic!

For more, follow me on Twitter @vicnastea.

A while ago, I did a thread for GitOps practitioners to share their pros/cons. Check it out here:

Standard
Kubernetes

Customizing Upstream Helm Charts with Kustomize

Introduction

The Helm charts repository has seen some amazing growth over the last year. We now have over 200 applications that you can install into your Kubernetes clusters with a single command. Along with the growth in the number of applications that are maintained in the Charts repository, there has been huge growth in the number of contributions that are being received. The Charts repo gives the community a place to centralize their understanding of the best practices of how to deploy an application as well which configuration knobs should be available for those applications.

As I mentioned in my talk at Kubecon, these knobs (provided by the Helm values.yaml file) are on a spectrum. You start out on the left and inevitably work your way towards the right:

values

When a chart is first introduced, it is likely to have the use case of its author met. From there, other folks take the chart for a spin and figure out where it could be more flexible in the way its configured so that it can work for their use cases. With the addition of more configuration values, the chart becomes harder to test and reason about as both a user and maintainer. This tradeoff is one that is hard to manage and often ends with charts working their way towards more and more flexible chart values.

A class of changes that we have seen often in the Chart repository is customizations that enable low level changes to Kubernetes manifests to be plumbed through to the values file. Examples of this are:

By now, most of our popular charts allow this flexibility as it has been added by users who need to make these tweaks for the chart to be viable in their environments. The hallmark of these types of values is that they plumb through a K8s API specific configuration to the values.yaml that the user interacts with. At this point, advanced users are happy to be able to tweak what they need but the values.yaml file becomes longer and more confusing to reason about without in-depth Kubernetes knowledge.

There is a good portion of the PRs for upstream charts that are to add these last-mile customizations to charts. While these are very welcome and help others not have to fork or change charts downstream, there is another way to make upstream charts work better in your environment.

Kustomize is a project that came out of the CLI Special interest group. Kustomize “lets you customize raw, template-free YAML files for multiple purposes, leaving the original YAML untouched and usable as is.” So given this functionality of customizing raw Kubernetes YAML, how we can we leverage it for customization of upstream Helm charts?

The answer lies in the helm template command which allows you to use Helms templating and values.yaml parameterization but instead of installing into the cluster just spits out the manifests to standard out. Kustomize can patch our chart’s manifests once they are fully rendered by Helm.

helm-kustomize

Tutorial

So what does this look like in practice? Lets customize the upstream Jenkins chart a bit. While this chart includes tons of ways to parameterize it using the extensive values file, I’ll try to accomplish similar things using the default configuration and Kustomize.

In this example I want to:

  1. Override the default plugins and include the Google Compute Engine plugin
  2. Increase the size of the Jenkins PVC
  3. Bump the memory and CPU made available to Jenkins (it is Java after all)
  4. Set the default password
  5. Ensure that the -Xmx and -Xms flags are passed via the JAVA_OPTS environment variable

Let’s see what the flow would look like:

  1. First, I’ll render the upstream jenkins/chart to a file called jenkins-base.yaml:

    git clone https://github.com/kubernetes/charts.git
    mkdir charts/stable/my-jenkins
    cd charts/stable
    helm template -n ci jenkins > my-jenkins/jenkins-base.yaml
  2. Now I’ll have helm template individually render out the templates I’d like to override

    helm template -n ci jenkins/ -x templates/jenkins-master-deployment.yaml > my-jenkins/master.yaml
    helm template -n ci jenkins/ -x templates/home-pvc.yaml > my-jenkins/home-pvc.yaml
    helm template -n ci jenkins/ -x templates/config.yaml > my-jenkins/config.yaml
  3. Next, I can customize each of these resources to my liking. Note here that anything that is unset in my patched manifests will take the value of the base manifests (jenkins-base.yaml) that come from the chart defaults. The end result can be found in this repo:

    https://github.com/viglesiasce/jenkins-chart-kustomize/tree/master
  4. Once we have the patches we’d like to apply we will tell Kustomize what our layout looks like via the kustomization.yaml file.
    resources:
    - jenkins-base.yaml
    patches:
    - config.yaml
    - home-pvc.yaml
    - master.yaml
  5. Now we can install our customized chart into our cluster.

    cd my-jenkins
    kustomize build | kubectl apply -f -

    I hit an issue here because Helm renders empty resources due to the way that charts enable/disable certain resources from being deployed. Kustomize does not handle these empty resources properly so I had to remove them manually from my jenkins-base.yaml.

  6. Now we can port forward to our Jenkins instance and login at http://localhost:8080 with username admin and password foobar:

    export JENKINS_POD=$(kubectl get pods -l app=ci-jenkins -o jsonpath='{.items[0].metadata.name}')
    kubectl port-forward $JENKINS_POD 8080


  7. Now I can check that my customizations worked. First off, I was able to log in with my custom password. YAY.
    Next, in the Installed Plugins list, I can see that the Google Compute Engine plugin was installed for me. Double YAY.gce-plugin

Tradeoffs

Downsides

So this seems like a great way to customize upstream Helm charts but what am I missing out on by doing this? First, Helm is no longer controlling releases of manifests into the cluster. This means that you cannot use helm rollback or helm list or any of the helm release related commands to manage your deployments. With Helm+Kustomize model, you would do a rollback by reverting your commit and reapplying your previous manifests or by rolling forward to a configuration that works as expected and running your changes through your CD pipeline again.

Helm hooks are a bit wonky in this model since helm template doesn’t know what stage of a release you are currently on, it will dump all the hooks into your manifest. For example, in this example you’ll see that the Jenkins chart includes a test hook Pod that gets created but fails due to the deployment not being ready. Generally test hooks are run out of band of the installation.

Upsides

One of the nice things about this model is that I can now tweak a chart’s implementation without needing to submit the change upstream in order to keep in sync. For example, I can add my bespoke labels and annotations to resources as I see fit. When a chart that I depend on gets updated I can simply re-compute my base using helm template and leave my patches in tact.

Another benefit of using Helm with Kustomize is that I can keep my organization-specific changes separate from the base application. This allows for developers to be able to more clearly see the per-environment changes that are going on as they have less code to parse.

One last benefit is that since release management is no longer handled by Helm, I don’t have to have a Tiller installed and I can use tooling like kubectl, Weave Flux or Spinnaker to manage my deployments.

What’s Next

I’d like to work with the Helm, Charts and Kustomize teams to make this pattern as streamlined as possible. If you have ideas on ways to make these things smoother please reach out via Twitter.

Standard
Kubernetes

Policy-based Image Validation for Kubernetes with Anchore Engine

Introduction

As part of the journey to Kubernetes, you choose a set of Docker images that will house the dependencies needed to run your applications. You may also be using Docker images that were created by third parties to ship off-the-shelf software. Over the last year, the Kubernetes community has worked hard to make it possible to run almost any compute workload. You may now have operational tools such as monitoring and logging systems, as well as any number of databases and caching layers, running in your cluster alongside your application.

Each new use of Kubernetes requires that you vet the images that you will have running inside your cluster. Manual validation and introspection of images may be feasible, albeit tedious, to do for a very small number of images.  However, once you’ve outgrown that, you will need to set up automation to help ensure critical security vulnerabilities, unwanted dependency versions, and undesirable configurations don’t make their way into your clusters.

In the 1.9 release, Kubernetes added beta support for user configurable webhooks that it queries to determine whether a resource should be created. These ValidatingAdmissionWebhooks are a flexible way to dictate what configurations of resources you’d want to allow into your cluster.  To validate the security of your images, you can send each pod creation request to a webhook and return whether the image in the PodSpec adheres to your policies. For example, a naive implementation could allow pod creation only when images come from a set of whitelisted repositories and tags.

For more complicated image policies, you may need a more specialized tool that can gate your pod creation. Anchore Engine is “an open source project that provides a centralized service for inspection, analysis and certification of container images.” With its policy engine you can create and enforce rules for what you consider a production-ready image. As an example, an Anchore policy might check the following things about an image:

  1. No critical package OS vulnerabilities
  2. FROM always uses a tag
  3. Image runs as non-root by default
  4. Certain packages are not installed (ie openssh-server)

Below is a screenshot of these rules in the anchore.io policy editor:

In the next section, I’ll demonstrate how Anchore Engine can be integrated into your Kubernetes clusters to create a ValidatingWebhookConfiguration that runs all images through an Anchore policy check before allowing it into the cluster.

Mechanics of the image validation process

Infrastructure

The image validation process requires a few things to be deployed into your cluster before your policies can be enforced. Below is an architecture diagram of the components involved.

First, you’ll need to deploy Anchore Engine itself into the cluster. This can be achieved by using their Helm chart from the kubernetes/charts repository. Once installed, Anchore Engine is ready to accept requests for images to scan. Anchore doesn’t yet have a native API that Kubernetes can use to request validations. As such, we will create a small service inside of Kubernetes that can proxy requests from the ValidatingWebHookConfiguration.

The process of registering an admission server is relatively straightforward and can be accomplished with a single resource created in the Kubernetes API. Unfortunately, it takes more effort to create the server side process that will receive and respond to the admission request from Kubernetes. Thankfully, the good folks at Openshift have released a library that can be used as a base for creating admission servers. By leveraging the Generic Admission Server, we can reduce the amount of boilerplate in the server process and focus on the logic that we are interested in. In this case, we need to make a few requests to the Anchore Engine API and respond with a pass/fail result when we get back the result of Anchore’s policy check.

For instructions on setting this all up via a Helm chart, head over to the quick start instructions in the Kubernetes Anchore Image Validator repository.

Now that the server logic is handled, you can deploy it into your cluster and configure Kubernetes to start sending any requests to create Pods. With the infrastructure provisioned and ready, let’s take a look at the request path for an invocation to create a deployment in Kubernetes.

Request Flow

As an example, the following happens when a user or controller creates a Deployment:

  1. The Deployment controller creates a ReplicaSet which in turn attempts to create a Pod
  2. The configured ValidatingWebhook controller makes a request to the endpoint passing the PodSpec as the payload.
  3. The Anchore validation controller configured earlier will take that spec, pull out the image references from each container in the Pod and then ask Anchore Engine for a policy result using the Anchore API.
  4. The result is then sent back to Kubernetes.
  5. If the check fails for any of the images, Kubernetes will reject the Pod creation request.

Multi Cluster Policy Management

It is common to have multiple Kubernetes clusters with varying locations, purposes, or sizes. As the number of clusters grows, it can be hard to keep configurations in sync. In the case of the image policy configuration, you can leverage Anchore’s hosted service to serve as the source of truth for all of your clusters’ image policies.

Policy-based Image Validation for Kubernetes with Anchore Engine

Anchore allows you to create, edit, and delete your policies in their hosted user interface, then have the policies pulled down by each of your Anchore Engine services by turning on the policy sync feature. Once policy sync is enabled, Anchore Engine will periodically check with the hosted service to see if any updates to the active policy have been made. These may include new approved images. or the addition/removal of a rule.

What’s Next?

Head over to the Kubernetes Anchore Image Validator repository to check out the code or run the quick start to provision Anchore Engine and the validating web hook in your cluster.

Big thanks to Zach Hill from Anchore for his help in getting things wired up.

Standard